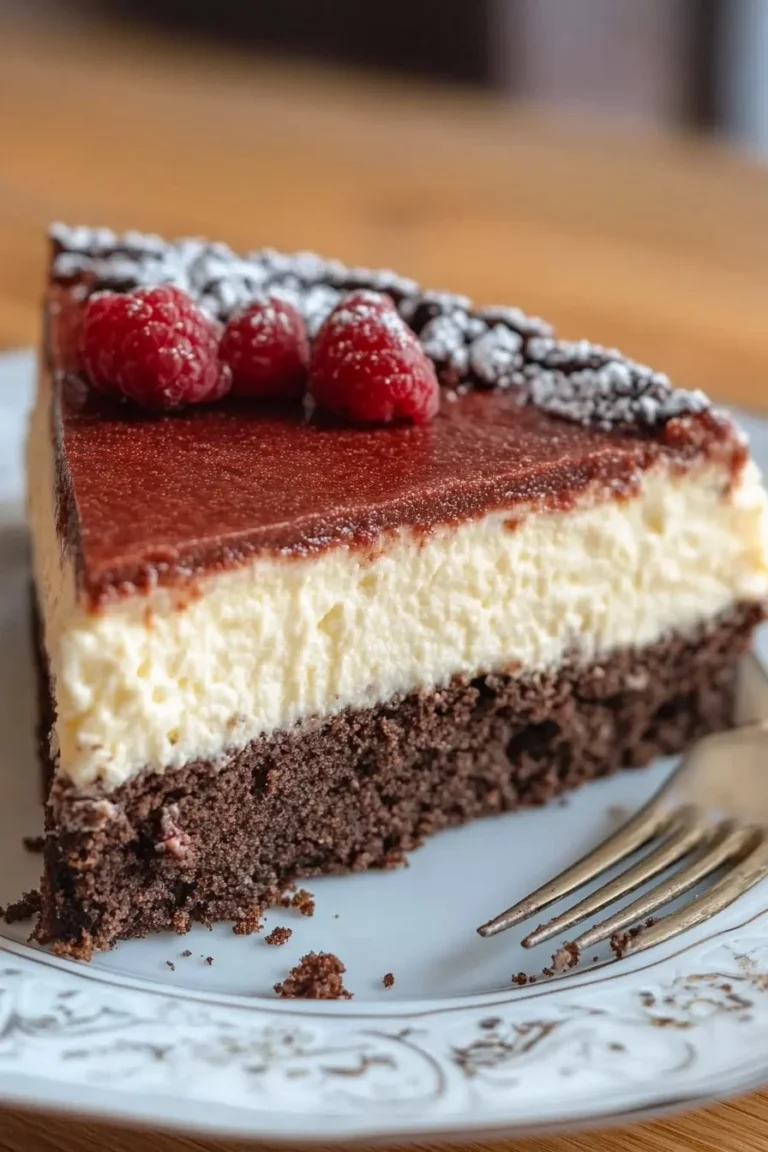
Fudgy Red Velvet Brownies With Cheesecake Layer
Imagine biting into a rich, fudgy red velvet brownie with a creamy cheesecake swirl that melts in your mouth. The flavors meld together in perfect harmony, making them an irresistible treat for all occasions. Red velvet may be traditionally associated with celebratory moments, but these brownies are perfect for any family gathering, filling your home with comforting aromas and smiles. A fun fact: red velvet cake became popular in the South during the 1920s! This dessert is truly special, combining the decadence of classic brownies with the luxuriousness of cheesecake. For fans of my salted caramel brownies recipe, these fudgy red velvet brownies with cheesecake layer are a guaranteed hit, bringing that same satisfaction in a twist of color and flavor.
What is Fudgy Red Velvet Brownies With Cheesecake Layer?
You might be wondering, “What exactly is a fudgy red velvet brownie with a cheesecake layer?” Is it a brownie? Is it a cake? One could argue that it’s the best of both worlds! Picture this: vibrant red brownies infused with subtle cocoa flavor, topped with a creamy cheesecake layer that takes every bite over the top. And let’s be real—the way to a man’s heart is through his stomach! So why not whip up a batch of these delightful treats to impress your loved ones? Just picture the smiles and satisfied sighs at your next family gathering. Trust me; everyone will be asking for seconds!
Why You’ll Love This Fudgy Red Velvet Brownies With Cheesecake Layer
This fudgy red velvet brownies with cheesecake layer recipe is a highlight of any dessert table. Not only does it elegantly balance the rich chocolatey taste of red velvet with a soft cheesecake layer, but it also offers cost-saving benefits of cooking at home. Imagine crafting these beauties for a fraction of the price you’d pay at a bakery! Plus, the flavor sophistication of this dessert is unmatched, especially when topped with a simple dollop of whipped cream or a sprinkle of crushed nuts. If you’re a fan of my triple chocolate brownies, you’ll find this recipe equally tantalizing and deeply satisfying. So what are you waiting for? Let’s dive into making these show-stoppers!
How to Make Fudgy Red Velvet Brownies With Cheesecake Layer
Quick Overview
The beauty of fudgy red velvet brownies with cheesecake layer lies in their simplicity. They bring a delightful moist texture and rich flavor without consuming your entire day in the kitchen. With a prep time of just 20 minutes, you can have these prepared and in the oven in no time!
Ingredients
- For the Brownies:
- 1 cup all-purpose flour
- 1 cup granulated sugar
- 1/2 cup unsweetened cocoa powder
- 1/2 teaspoon baking powder
- 1/2 teaspoon salt
- 1/2 cup unsalted butter, melted
- 2 large eggs
- 2 tablespoons red food coloring
- 1 teaspoon vanilla extract
- For the Cheesecake Layer:
- 8 ounces cream cheese, softened
- 1/2 cup powdered sugar
- 1 teaspoon vanilla extract (for cheesecake layer)
- 1 large egg (for cheesecake layer)
Make sure to have all your ingredients measured out and ready to go!
Step-by-Step Instructions
- Preheat the Oven: Begin by preheating your oven to 350°F (175°C). Grease a 9×9-inch baking dish or line it with parchment paper for easy removal.
- Mix the Dry Ingredients: In a medium bowl, whisk together the all-purpose flour, granulated sugar, cocoa powder, baking powder, and salt until well combined.
- Combine Wet Ingredients: In a large bowl, mix the melted butter, eggs, red food coloring, and vanilla extract until smooth and well-combined.
- Combine Wet and Dry: Gradually fold the dry mixture into the wet mixture using a spatula. Be careful not to overmix; you want to maintain that fudgy texture!
- Prepare the Cheesecake Layer: In a separate bowl, beat the softened cream cheese until smooth. Add the powdered sugar, vanilla extract, and egg, mixing until just combined.
- Layer the Batter: Pour half of the brownie batter into the prepared baking dish, spreading it evenly. Top it with the cheesecake layer, then dollop the remaining brownie batter over it, swirling gently with a knife to create a marbled effect.
- Bake: Place the dish in the preheated oven and bake for about 30-35 minutes, or until a toothpick inserted into the center comes out with only a few moist crumbs.
- Cool and Serve: Allow the brownies to cool in the pan for at least 20 minutes before slicing into squares. They taste even better after chilling in the fridge for a bit!
Top Tips for Perfecting Fudgy Red Velvet Brownies With Cheesecake Layer
- Substitutions: If you’re looking for a healthier alternative, consider using whole wheat flour instead of all-purpose flour. You can also replace granulated sugar with coconut sugar for a more wholesome option.
- Timing: Make sure not to overbake the brownies! Keep a close eye on them after the 30-minute mark. The slightly underbaked texture will enhance the fudginess.
- Mixing: When combining the brownie batter, be gentle! Overmixing can lead to a denser texture. Just mix until you see no dry spots.
Storing and Reheating Tips
These fudgy red velvet brownies with cheesecake layer will keep well in the refrigerator for up to one week in an airtight container. If you want to extend their life, they can be frozen for up to three months. When you’re ready to enjoy them, simply thaw in the fridge overnight and reheat in the microwave for about 15 seconds to regain that soft, gooey goodness.
Now you have everything you need to make an impressive batch of fudgy red velvet brownies with cheesecake layer! Your friends and family will love this simple yet extraordinary treat. Happy baking!

FAQ
- Can I add nuts to the brownie batter?
Absolutely! Chopped walnuts or pecans would add a lovely crunch and a flavor boost. - How can I make this gluten-free?
You can substitute all-purpose flour with a gluten-free flour blend to accommodate gluten sensitivities. - What can I use instead of cream cheese?
Mascarpone cheese or a dairy-free cream cheese alternative works great as a substitute! - Can leftovers be frozen?
Yes! Just wrap them tightly in plastic wrap before placing them in a freezer-safe container.
I hope you enjoy this recipe as much as I do! Make sure to share your creations and let me know how they turn out!